Make sprouts at home! It’s easier than you might think, cheaper, and less wasteful as well as you can make as little or as much as you need at a time. It’s all about soaking and sprouting times, so stick to the guide of 18 soaking times outlined below and you’ll be set.

Benefits of soaking and sprouting
Soaking and sprouting is said to neutralise the plants’ own protective enzyme inhibitors which can be make seeds and grains hard to digest (this is why birds are such good sowers of plant-life). These can cause bloating and indigestion in some people. Soaking and sprouting grains and legumes turns them into living plants, making nutrients like vitamin B and C more bioavailable. Sprouting also makes legumes alkaline.
How to make sprouts at home
To make sprouts at home, you will need some seeds, nuts or legumes for sprouting.Opt for organic varieties if you can.
We love the fresh green flavour of sprouts and often enjoy them as a snack, add them to sandwiches or salads. Lentils and chickpeas are some of our favourites, but sunflower seeds and beans of all sorts are great too!
I recommend using filtered water. Remember that it feeds the plant, which we end up eating so it’s best to choose pure ingredients. And that includes water!
Want more reading? Check out this article about what’s so special about sprouted wheat.

How to Make Sprouts at Home with 18 Soaking Times Guide
Ingredients
- 1/2 cup nuts, seeds, grains or legumes (soaking guide below)
- cold filtered water
Instructions
- Place a desired amount of nuts, seeds, grains on legumes in a clean glass bowl, jug or jar and cover with enough filtered water to come up about 2 inches above. Soak for the required time - see table below. Drain using a sieve then rinse with filtered water.
- If sprouting, leave the food inside the sieve and leave at room temperature for the required time (see table below) to sprout. Dip in filtered water for a couple of minutes every few hours to "water" the sprouts.
- Once sprouted to about half a cm long, transfer sprouts to an airtight container and store in the fridge for 2-5 days.
Soaking and Sprouting Times for Nuts, Seeds, Legumes and Grains
| Adzuki beans | 8 hours | 3-5 days |
| Alfalfa | 8 hours | 1-3 days |
| Almonds | 8-12 hours | 12-24 hours |
| Barley | 6-8 hours | 2 days |
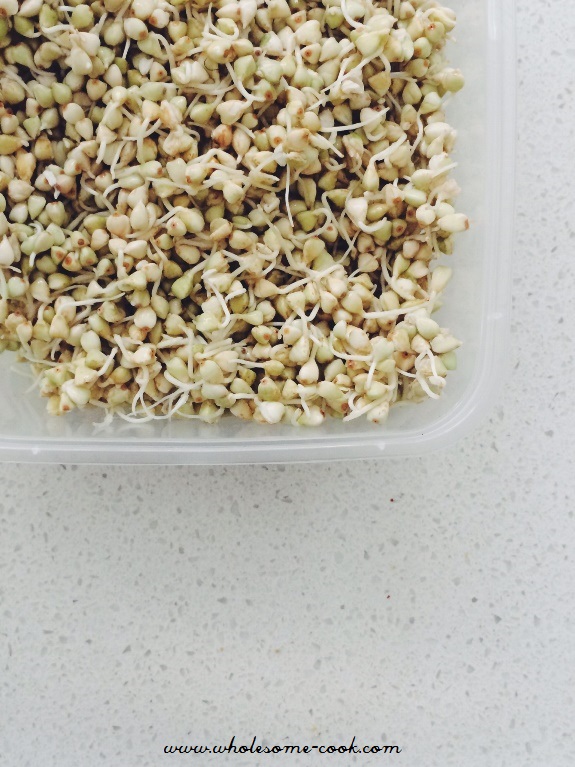
| Buckwheat | 30 minutes | 1-2 days |
| Cashews | 2-8 hours | does not sprout |
| Chickpeas | 12 hours | 12-24 hours |
| Corn | 12 hours | 2-3 days |
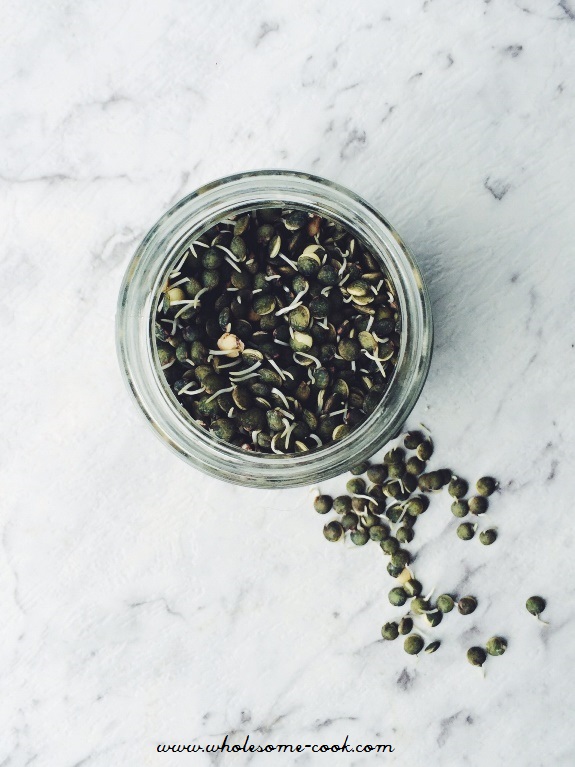
| Lentils | 8 hours | 12-24 hours |
| Millet | 8 hours | 2-3 days |
| Mung beans | 24 hours | 2-4 days |
| Peas (Sugar Snap) | 24 hours | 3-5 days |
| Pepitas (pumpkin seeds) | 8 hours | 1-2 days |
| Quinoa | 2 hours | 1-2 days |
| Rice | 8 hours | 3-5 days |
| Spelt and Rye | 8 hours | 2-3 days |
| Sunflower seeds | 6 hours | 2-3 days |
| Wheat | 6 hours | 2-3 days |
6 comments
Do you just use regular dried legumes or seeds or do you buy those special packets? I’ve seen them but they don’t seem that much cheaper than the already sprouted boxes.
Hi Conrad, I just use the regular ones – you can buy them in bulk stores or just in regular supermarket in the dried food section. They are a lot cheaper too.
That’s a great post, thank you! I must say I often buy sprouts and then end up tossing most of them because I find the packets too big.
[…] School holidays are here, I’m going to get sprouting. […]
How exciting I inadvertently sprouted sone butternut squash seeds. But how would I sprout black turtle beans please.
Hi Cheri, that’s great! To sprout black turtle beans the method is very similar. Soak dried beans in 2-3 times more cool filtered water for 12 hours. Then drain and rinse and set out on a sieve lined with cheesecloth set out of direct sunlight. Rinse every 8-12 hours and allow to sit on the cheesecloth in a sieve. You should have the sprouts ready in around 3-4 days.