Since many of you have asked me questions about suppliers and solutions, I thought I would put together a little BEFORE & AFTER post, you know, just in case you feel like doing a full blown reno yourself – yup, I’m officially hooked!
Renovating a house with a toddler in tow can be a tasking job. I know, because I’ve just done it and despite having a wonderful builder MJ, project manager Shady and team of contractors behind me, I’m pretty hands on.
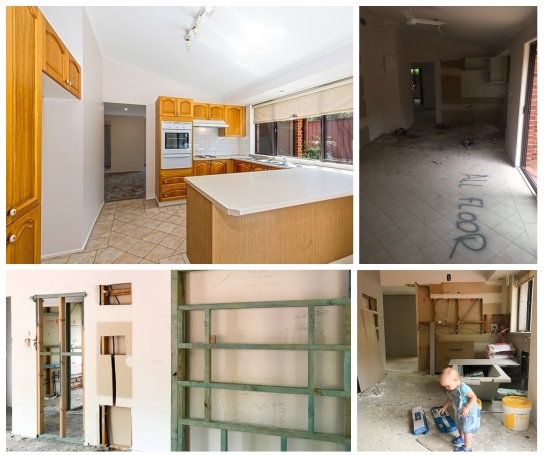
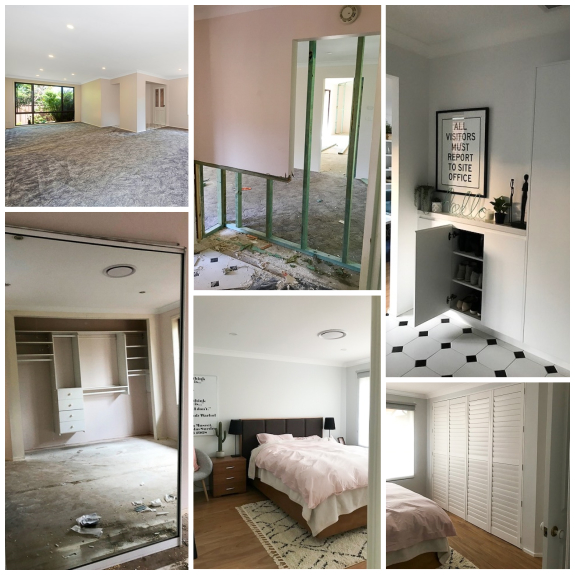
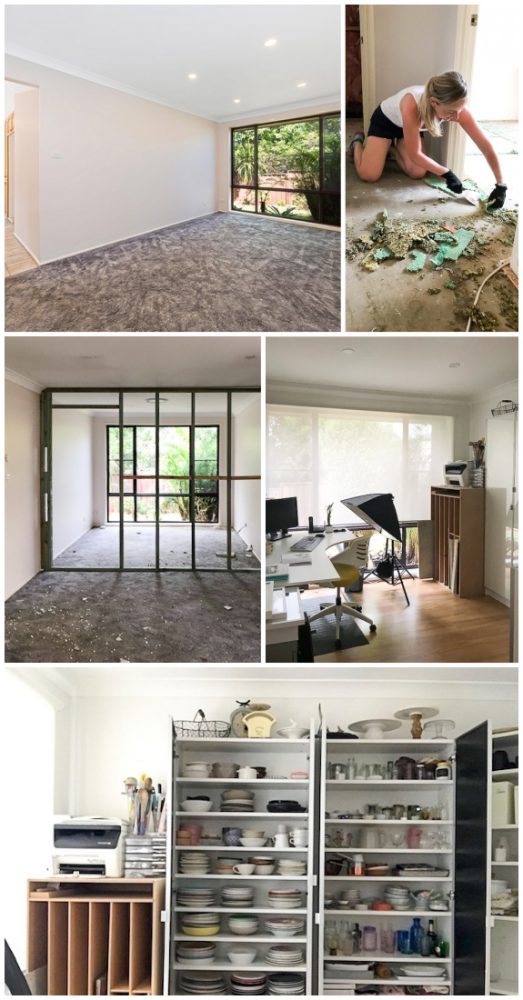
I was on site for the demolition. I was on site to rip up the 19 year old carpet and take it to the tip (with a little help from my friends). I was on site every day making sure things were how I wanted them to be.
For 9 weeks.
2 bathrooms, a new kitchen space with walk-in pantry, new laundry, new office and sitting area, hallway storage, jonery and flooring LATER, and I can say it was all so worth it in the end. I am beyond thrilled at how the house turned out and all within budget!
Have you ever built stuff or done a big DIY reno at home? Would love to hear your stories!
There are a few things I’ve done “differently”
- I installed underfloor heating in the kitchen and dining area where I spend most of the time creating recipes and shooting content for clients. It’s also where Mialina spends most of the time on the floor playing, I wanted the floor to be warm.
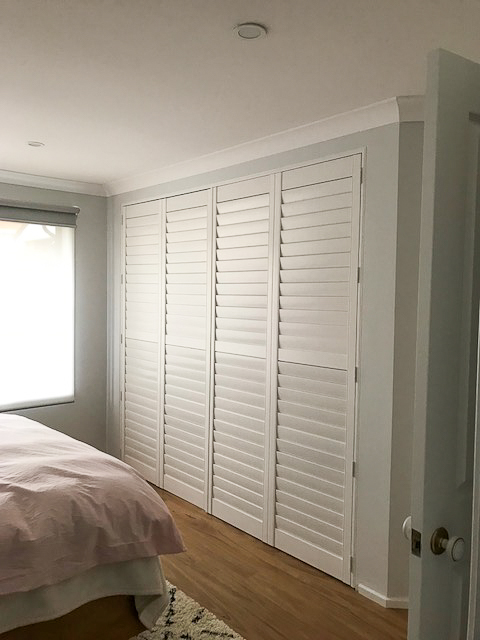
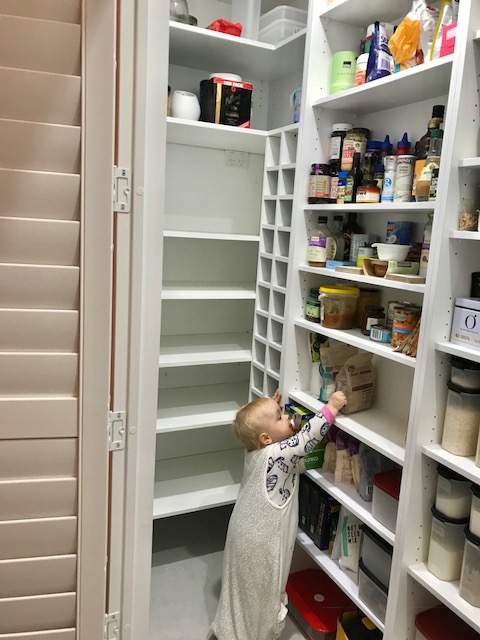
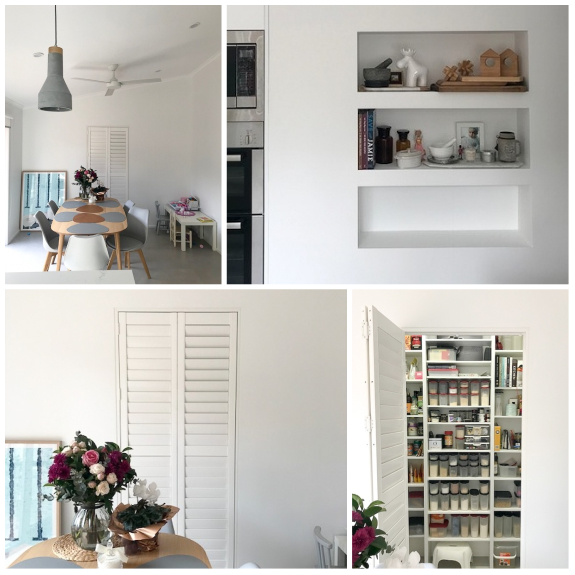
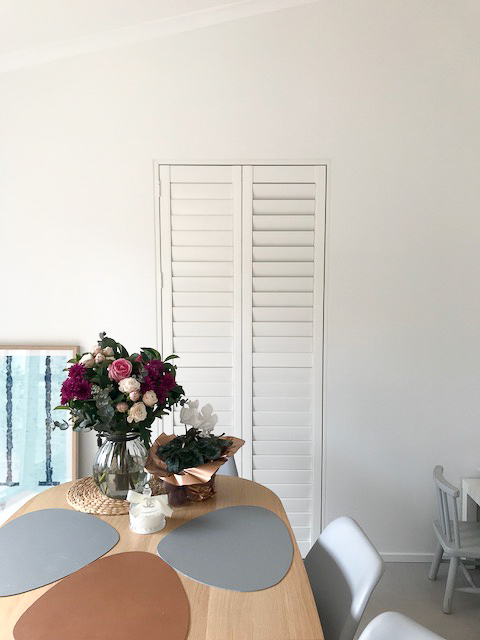
- Inspired by Three Birds Renovations and their House 6 (swooon!!!) I was scouring ebay and demolition sales for louvre cupboard doors for the master wardrobe and walk-in pantry, but I couldn’t find the right size for what I needed. I ended up installing plantation shutters instead in both and omg, amazing! Love them!
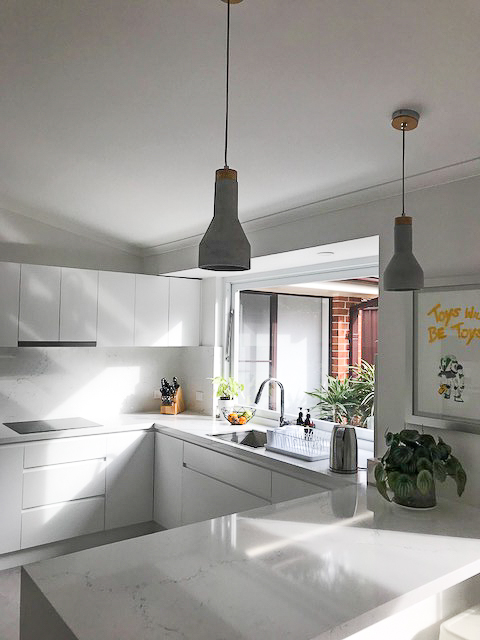
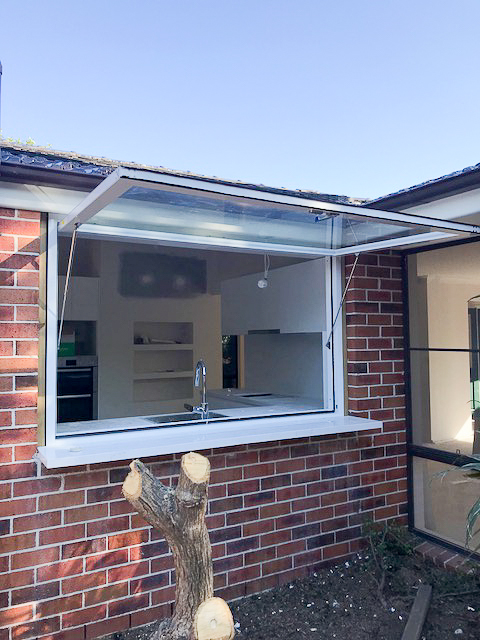
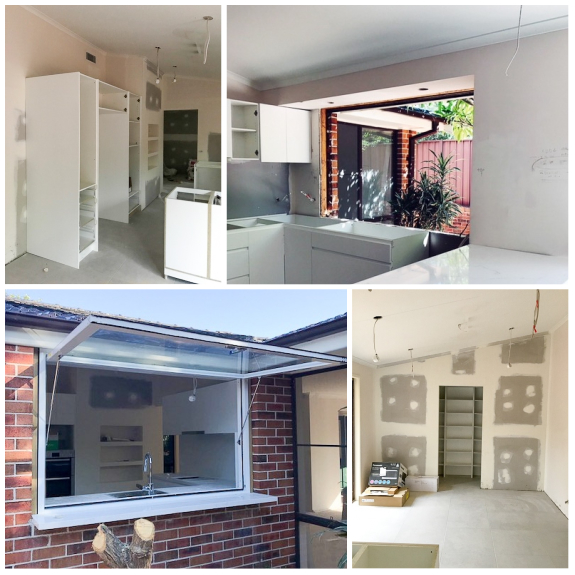
- I’ve also had my builder install a big gas-strut canteen-style window in the kitchen with the kitchen benchtop extending out to make a servery outside. I love it!
I’ve built in plenty of storage with custom joinery
The house came with one double door linen cupboard in the laundry. It was a gyprock cupboard and such a waste of space. That was it for storage outside of wardrobes. Yeek!
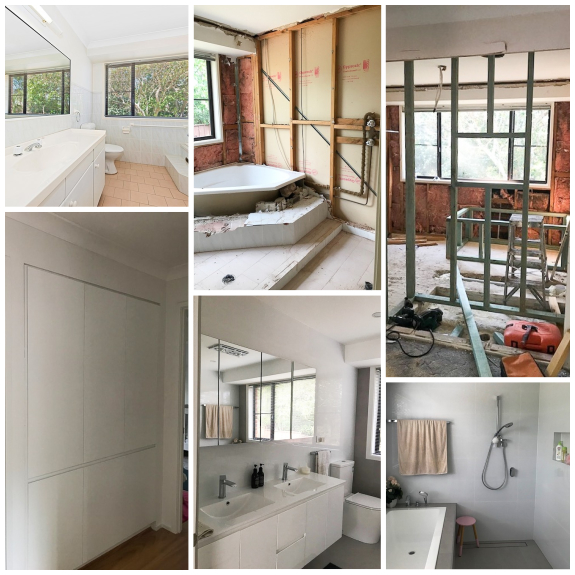
- In the hallway next to the two bedrooms I reclaimed a shower-sized space from the adjacent bathroom, to accommodate a large built-in storage unit. It’s beautifully seamless and makes so much sense – this used to be the step-down shower!
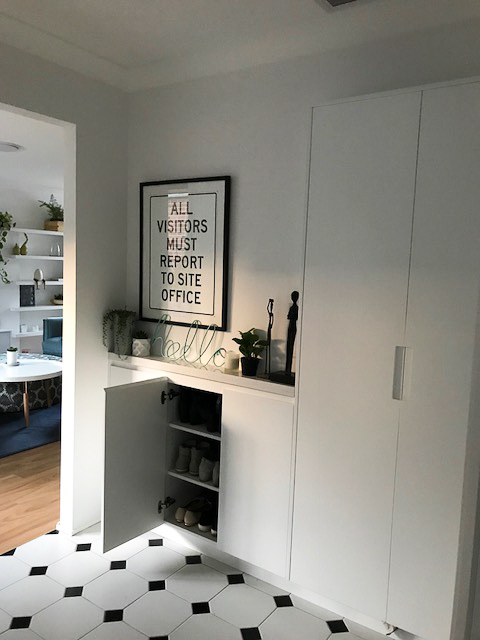
- In the entryway – I put in more false walls and joinery to accommodate shoe and winter jacket storage. The winter jacket storage went into the same space that that was once a doorway and the shoe cabinet space was cut out from the wall. It only sticks out by about 10cm but they are both actually 60cm deep!
- I’ve also lifted the bedroom wardrobe cavity height to provide better access to the top shelf there and installed plantation shutters for doors instead of mirrored sliding doors to give the room an airy feel. I love them!
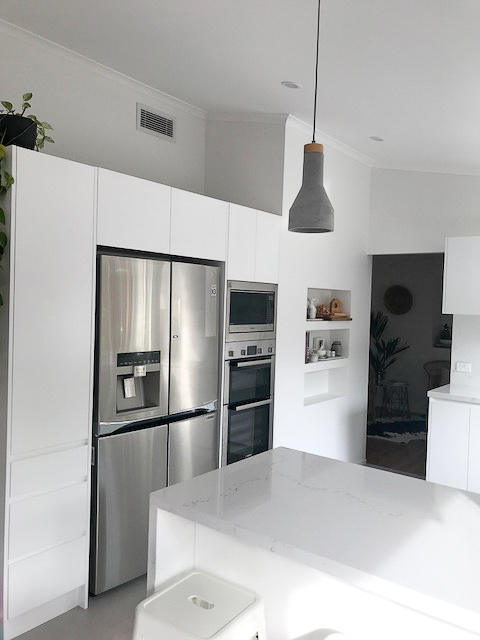
- In order to make the fridge cavity in the kitchen deeper, I moved the doorway over by 20cm and built in a false wall in front of the old one – but instead of wasting the space behind it I asked for 3 niche shelves to be incorporated into the wall for cookbooks and other nick-knacks.
- I’ve also put in a wall into the dining room and got a functional and massive walk-in pantry built in complete with a piece of (leftover) stone benchtop!
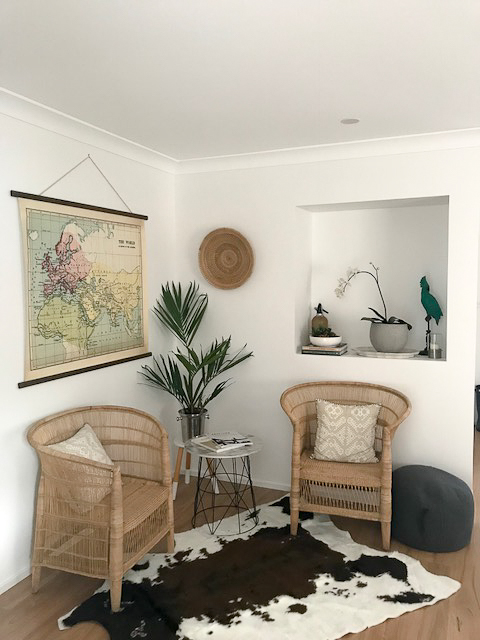
- I did the same (this was a last minute decision) in the new sitting area to create a large display shelf in the false wall that houses the shoe storage on the other side, in the entry way.
Having grown up in Poland I think finding clever storage solutions in small spaces runs in my blood.
Speaking of building stuff…
My original plans included keeping a second fridge in the pantry but with my enormous LG fridge freezer there was no need for that so I ended up heading to Bunnings and getting some white melamine boards pre-cut to my required size and building extra shelving and a wine rack with a help from a friend – one afternoon and plenty of satisfaction!
Clever solutions
One thing I was adamant about was making the space full of clever storage.
- Installing a power point in the laundry “broom” cabinet – for the wall-mounted dyson, another in the small pantry cupboard in the kitchen – for the toaster and in the walk-in pantry for the coffee machine, Vitamix and Thermomix were no brainers. They hide away the mess and leave more counter space to work with.
- The same went for installing power points in the main bathroom and ensuite INSIDE the shaving cabinets (hello more storage) to accommodate unsightly things such as electric toothbrushes and shavers and leave more bench space.
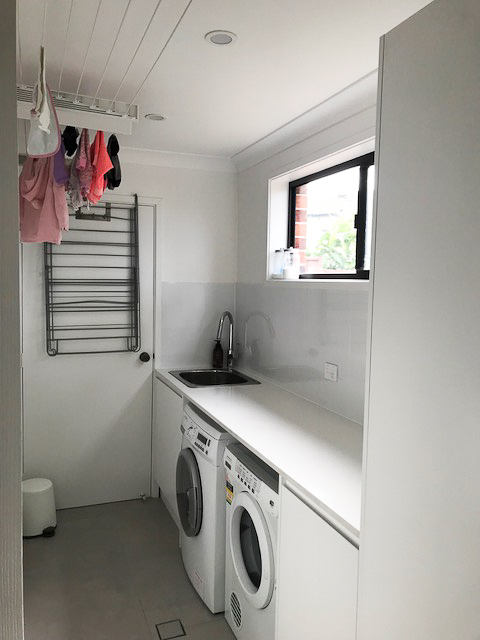
- Since I’ve also put underfloor heating in the laundry to help dry the washing in winter, and I didn’t have space to put my beloved IKEA drying rack under the counter there, I ended up installing a couple of Leifheit clothes airers that fold away when not in use.
- In the kitchen, my under the sink drawer houses two bins and plenty of storage of other kitchen essentials in a concealed second drawer under the sink.
- I’ve had an electrician install an IKEA kick-open mechanism to the big drawer so that when I have my hands dirty I don’t need to touch the bin drawer, simply kick to open.
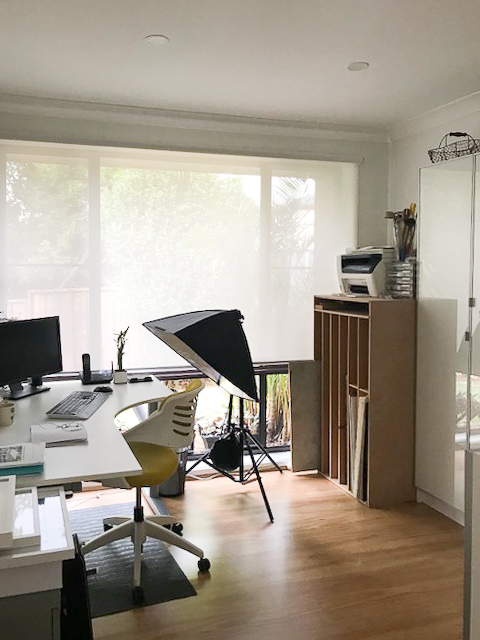
- The office space came up nicely with a row of Billy bookcases to house all my props and stationery – I picked up most of these secondhand off Facebook and Gumtree, adding extra shelving. I also built a background storage unit that fits perfectly in the space.
Colour scheme – walls, trims, tiles and blinds
The walls are a far cry from the pinkish white that was on the walls here when I bought the place (en vogue right now, but I’m afraid it was the WRONG shade), exacerbated only by the “mission brown” colorbond fence and bricks outside.
- I went through about 8 sample pots of Dulux whites (there are like 100 shades to choose from) and absolutely fell in love with Lexicon Quarter for all living area walls, Vivid White for ceilings, doors and trims and Terrace White Half for bedroom walls which is a true medium-light grey.
- Grey concrete look and white tiles for both bathrooms, the laundry and the kitchen / dining pantry.
- All my window blinds including rollers, double rollers and venetial follow the same colour scheme.
It’s a light and bright space now with a mixture of pure whites and different shades of light grey and I love it.
Sticking to the BUDGET!
I ran a spreadsheet detailing everything – from tiles and grout, to blinds, sinks, tapware and unforseen variations. It helped keep things in check and gave me a good insight into where I could look for savings if other items went over.
To save money I:
- ordered the Hansgrohe tapware from Poland (it was cheaper even with shipping)
- got some good deals on tiles from Beaumont (thanks to Natasha who works for my builder).
- ripped up the old carpet and disposed of it myself (okay, with a little help from the A-team of friends)
- got some great deals on all the appliances from Bing Lee
- ordered all window blinds and shutters from DIY Online blinds (fantastic service, quality and VERY affordable)
- loved shopping for bargains at Fanatstic Furniture (white kitchen counter stools $24) and Kmart (faux cow hide $39).
The stuff I wouldn’t compromise on
Ummm… everything?
- I absolutely loved the look of Quantum Quartz Michaelangelo stone for my kitchen benchtop and servery window. It’s subtly stunning and I love having it in 4mm. There was enough to make the splashback of it and to install the little shelf in the entryway. Woohoo!
- No handles anywhere in the kitchen makes it look even more clean.
- Tapware – I used a mixture of Ikon Kara and Hansgrohe for my tapware; the kitchen and laundry taps as well as the bath and shower taps are stunning and functional.
- The before-mentioned gas-strut kitchen window.
- Laminate Quickstep Flooring in Eligna Blackbutt with no grooves between boards installed in a day by Connie’s team.
Now for the outside
Now the fun job of building the stuff outside starts! I’m thinking of painting the “mission brown” fence and the brick exterior and retaining walls. And building a pergola… and hanging a washing line. And doing the deck under the canteen window…
I would love to hear from you on other nifty ideas, solutions and budget friendly tips for renovating outside.
2 comments
Renovating is such a rewarding and addictive process! I was a spreadsheet fiend when it came to our home reno, and it really helped to keep us on track too. So many great storage ideas you’ve included are genius! you have me itching to start another reno already…
Thanks Mel! Isn’t it just??? I found it to be a good creative outlet too! I’m glad I have you itching to start another one – hahahaha – is that on the cards? You know, I could do this for a job! Maybe we should join forces!